Welcome to the 400 Day Clock Repair Guide‚ a comprehensive resource for restoring and maintaining these unique timepieces. This guide covers history‚ mechanics‚ tools‚ troubleshooting‚ and maintenance‚ ensuring a detailed understanding of the craft.
1.1 History and Importance of the 400 Day Clock
The 400 Day Clock‚ also known as an anniversary clock‚ has a unique mechanism designed to run for approximately 400 days on a single winding. Originating in the late 19th century‚ it became popular for its long power reserve and precise timekeeping. Its historical significance lies in its innovative design‚ making it a cherished collector’s item and a staple in horology. Understanding its history helps appreciate its intricate craftsmanship and enduring appeal.
1.2 Overview of the Repair Guide PDF
The 400 Day Clock Repair Guide PDF offers a detailed‚ step-by-step approach to restoring these unique timepieces. With over 500 pages‚ it includes historical context‚ technical diagrams‚ and practical instructions. The guide covers disassembly‚ troubleshooting‚ and maintenance‚ making it an essential resource for both beginners and experienced horologists. Its clear‚ concise format ensures a smooth repair process‚ preserving the clock’s functionality and elegance for years to come.
Understanding the 400 Day Clock Movement
The 400 Day Clock Movement is renowned for its unique design‚ offering exceptional timekeeping over an extended period. Its intricate mechanism balances power reserve with precise engineering‚ making it a marvel of horology.
2.1 Key Components of the Movement
The 400 Day Clock movement features a mainspring‚ gear train‚ escapement‚ and balancing wheel. These components work together to store energy and regulate timekeeping precisely. The mainspring powers the mechanism‚ while the gear train transmits energy to the escapement‚ which releases it in controlled increments. The balancing wheel oscillates to maintain accurate timekeeping‚ ensuring the clock runs smoothly for its extended cycle.
2.2 How the 400 Day Mechanism Works
The 400 Day Clock operates by storing energy in a mainspring‚ which powers a gear train. This train transmits energy to an escapement‚ releasing it in precise increments. The balancing wheel oscillates‚ dividing time accurately. The mechanism is designed to run continuously for 400 days on a single wind‚ making it a remarkable example of horological engineering. Regular maintenance ensures optimal performance and longevity of the timepiece.

Tools and Materials Needed for Repair
3.1 Essential Tools for Clock Repair
Key tools include precision screwdrivers‚ jeweler’s pliers‚ a mainspring winder‚ and a cleaning solution. These ensure proper disassembly‚ adjustment‚ and maintenance of the 400 Day Clock mechanism effectively.
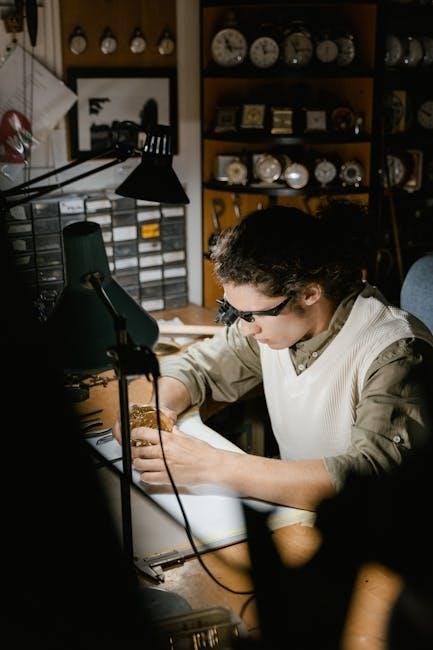
The repair of a 400 Day Clock requires specialized tools. A mainspring winder is crucial for safely handling and rewinding springs. Precision screwdrivers‚ jeweler’s pliers‚ and a cleaning solution are essential for disassembly‚ adjustment‚ and maintenance. A timing machine can help verify accuracy post-repair. Additional tools include a bell-shaped mainspring clamp and a dial key for bezel removal. These tools ensure precise and effective repair‚ preserving the clock’s functionality and longevity.
3.2 Recommended Materials and Supplies
For a successful repair‚ gather high-quality materials like synthetic oil for lubrication and Dialite for pivot polishing. Mainspring clamps and replacement mainsprings are often necessary. Cleaning solutions‚ such as diluted alcohol or specialized clock cleaners‚ are essential for removing grime. Brass bushings and jeweled bearings may be needed for wear repairs. Always source materials from reputable horological suppliers or online marketplaces to ensure compatibility and durability. Proper supplies ensure precise repairs and maintain the clock’s integrity.

Troubleshooting Common Issues
This section helps identify and address common problems‚ such as the clock running fast or slow‚ intermittent stopping‚ or power issues. Refer to the guide for detailed solutions.
4.1 Identifying Common Problems
Common issues with 400 Day Clocks include the clock running fast or slow‚ intermittent stopping‚ or loss of power. These problems often stem from worn components‚ dirt buildup‚ or misaligned gears. Regular inspection and testing can help identify these issues early. The guide provides diagnostic techniques‚ such as observing the escapement and mainspring tension‚ to pinpoint faults. Addressing these problems promptly ensures optimal performance and longevity of the timepiece.
4.2 Diagnostic Techniques for the 400 Day Clock
Diagnosing issues in a 400 Day Clock involves inspecting the escapement‚ gear alignment‚ and mainspring tension. Use a protractor to check gear angles and ensure proper escapement function. Clean the movement thoroughly to identify worn or dirty components. Measure timing accuracy over a 24-hour period to detect irregularities. These steps help pinpoint issues efficiently‚ ensuring effective repairs and restoring the clock’s precision and longevity.

Step-by-Step Repair Guide
This section provides a detailed‚ step-by-step approach to repairing the 400 Day Clock‚ covering disassembly‚ component inspection‚ and reassembly. Follow the guide carefully for optimal results.
5.1 Disassembling the Clock
Begin by carefully removing the clock’s outer case to access the internal mechanism. Use specialized tools to release the movement from the dial. Gently detach the hands and dial‚ ensuring no damage; Next‚ remove the mainspring and gear train‚ taking note of each component’s position. Document each step for easy reassembly. Handle delicate parts with precision to avoid breakage. This methodical approach ensures a safe and effective disassembly process.
5.2 Reassembling and Adjusting the Movement
Begin reassembly by carefully reinstalling the gear train and mainspring‚ ensuring proper alignment. Reattach the dial and hands‚ verifying their securement. Adjust the mechanism to restore accurate timekeeping‚ focusing on the balance and escapement. Fine-tune the movement to achieve optimal performance‚ ensuring the 400-day power reserve is maintained. Test the clock thoroughly to confirm smooth operation and precision. Proper adjustment ensures the clock runs reliably for its full cycle.

Maintenance and Upkeep Tips
Regular cleaning and lubrication are essential for the clock’s longevity. Inspect the mechanism periodically to ensure smooth operation and accuracy. Use a protractor for precise adjustments. Proper care extends its lifespan and maintains reliability‚ ensuring the 400-day cycle remains consistent and precise over time. Always handle components with care to prevent damage. Regular maintenance is key to preserving the clock’s functionality and heritage.
6.1 Cleaning the Clock Mechanism
Cleaning the mechanism is crucial for maintaining the 400-day clock’s performance. Use mild cleaning agents and soft-bristle brushes to remove dust and grime without damaging components. Avoid harsh chemicals that can harm finishes or degrade parts. Proper cleaning ensures smoother operation and prevents wear. Always clean in a well-lit area to spot hidden debris. Regular maintenance keeps the clock accurate and reliable‚ preserving its intricate mechanics for years to come.
6.2 Regular Maintenance for Optimal Performance
Regular maintenance is essential to ensure the 400-day clock runs smoothly. Schedule annual inspections to check mainsprings‚ pivots‚ and bearings. Lubricate key points with high-quality clock oil to reduce friction and wear. Adjust the timekeeping as needed to maintain accuracy. Proper winding techniques and storing the clock in a stable environment also contribute to its longevity. Consistent care ensures the clock remains a precise and reliable timekeeper for generations.
Resources for Further Learning
Explore recommended PDF guides‚ online manuals‚ and tutorials for in-depth knowledge. The Horolovar 400-Day Clock Repair Guide is a trusted resource‚ offering detailed insights and practical solutions for enthusiasts and professionals.
7.1 Recommended PDF Guides and Manuals
The Horolovar 400-Day Clock Repair Guide is a highly recommended resource‚ offering detailed diagrams and troubleshooting tips. Additionally‚ Google’s advanced search allows filtering by PDF files‚ making it easier to find reliable manuals. These guides provide in-depth technical information and are essential for both beginners and experienced clock enthusiasts‚ ensuring accurate and effective repairs.
7.2 Additional Online Resources and Tutorials
Beyond PDF guides‚ online platforms like YouTube and specialized clock repair forums offer valuable tutorials and repair videos. Websites such as Horolovar and NAWCC provide detailed repair techniques and troubleshooting tips. These resources are ideal for visual learners and those seeking hands-on guidance. They often include step-by-step instructions and expert advice‚ making them indispensable for mastering the art of 400-day clock repair.
Safety Precautions
Always wear safety glasses and gloves when handling clock components. Work in a clean‚ well-lit area to avoid accidents. Be cautious with mainsprings‚ as they can release suddenly.
8.1 Handling Clock Components Safely
Handling clock components requires precision and care. Use a protractor for accurate adjustments and avoid touching gear teeth with bare hands. Clean components with pegwood or a soft brush to prevent damage. Never force parts together‚ as this can cause breakage. Keep the workspace dry and free from debris to ensure safe and effective repairs. Always handle mainsprings with caution‚ as they can release suddenly and cause injury.
8.2 Best Practices for Avoiding Damage
Always handle clock components with care to prevent damage. Use plastic tools to avoid scratching or bending parts. Clean gear teeth gently with a soft brush or pegwood. Avoid harsh chemicals that could degrade materials. Ensure the workspace is dry and free from debris. Store components in a protective case when not in use. Regularly inspect tools and replace worn or damaged ones to maintain precision and safety during repairs.
This guide provides a comprehensive approach to repairing and preserving 400 Day Clocks‚ ensuring their historical and mechanical legacy endures. By following these steps‚ you master the craft‚ guaranteeing precise timekeeping and extending the life of these unique timepieces for future generations.
9.1 Final Tips for Successful Repair
For a successful repair‚ maintain patience and attention to detail. Use high-quality tools and materials to ensure longevity. Test adjustments incrementally and avoid over-tightening components. Regularly refer to the guide for clarification. Keep the workspace clean and organized to prevent losing small parts. Finally‚ document your process for future reference and to track progress. These practices will help achieve a precise and durable repair‚ preserving the clock’s functionality and heritage.
9.2 The Value of Preserving Mechanical Timepieces
Mechanical timepieces like the 400 Day Clock are intricate works of art and engineering‚ representing centuries of horological innovation. Preserving them honors the craftsmanship of their creators and maintains a tangible connection to history. These clocks serve as educational tools‚ teaching future generations about precision mechanics and the evolution of timekeeping. By restoring and maintaining them‚ we ensure their legacy endures‚ fostering appreciation for traditional craftsmanship in a digital age.