Grasslin Timer Instructions Manual: A Comprehensive Guide
Discover comprehensive guidance for Grasslin timers‚ covering installation‚ programming‚ troubleshooting‚ and applications – ensuring optimal performance and longevity of your time control systems.
Grässlin timers represent a legacy of precision and reliability in time control solutions. This manual serves as your guide to unlocking the full potential of your new timer‚ whether it’s a mechanical or electronic model. From simple on/off scheduling to advanced programming with up to 20 memories‚ Grässlin offers versatility.
These timers are designed for diverse applications‚ including lighting‚ pumps‚ and heating systems. Proper installation and understanding of the operating principles‚ detailed within this guide‚ are crucial for safe and efficient operation. Explore the features and capabilities to optimize your time management needs.
Understanding Grasslin Timer Series
Grässlin offers a range of timer series‚ each tailored to specific needs. The Talento 800 Series provides 365-day‚ one‚ two‚ and four-circuit electronic time controls‚ suitable for standalone installation with optional indoor/outdoor enclosures. For simpler applications‚ the Optimum Timer Series delivers reliable mechanical operation.
Understanding these distinctions is key to selecting the right timer for your project. Electronic models offer advanced programming features like memory functions‚ while mechanical timers provide straightforward‚ dependable scheduling. This manual covers both series‚ ensuring you can effectively utilize your chosen Grässlin timer.
Talento 800 Series Overview
The Talento 800 Series represents Grässlin’s advanced electronic time control solutions. Designed for versatile applications‚ these timers feature 365-day programming capabilities across one‚ two‚ or four circuits. Installation flexibility is enhanced by compatibility with Grässlin indoor/outdoor enclosures.
A key benefit is the removable timer module‚ simplifying programming and change-out procedures. Always ensure connection to the correct supply voltage as indicated on the unit itself. These timers offer precise scheduling and robust performance for diverse control needs.
Optimum Timer Series Features

Grässlin’s Optimum Timer Series delivers sophisticated time control with a focus on user-friendliness and reliability. These timers boast an impressive 20 memory locations‚ allowing for the storage of numerous scheduling programs. This feature is invaluable for applications requiring frequent program changes or diverse operational needs.
Safety is paramount‚ with clear precautions outlined in the accompanying documentation. The series is designed for straightforward installation and programming‚ maximizing efficiency and minimizing downtime. Explore the full potential of precise time management.
Safety Precautions
Prioritize safety during installation and operation of your Grässlin timer. Always disconnect power before wiring or servicing the unit to prevent electrical shock. Ensure the timer is housed in an appropriate enclosure – indoor or outdoor – to protect against environmental factors.

Verify the supply voltage matches the timer’s specifications. Improper voltage can cause damage or create a fire hazard; Read and understand all instructions before use‚ and heed all warning labels. Incorrect installation voids the warranty.
Wiring and Installation
Proper wiring is crucial for safe and reliable operation. Connect only to the designated supply voltage indicated on the timer unit itself. For stand-alone installations‚ utilize a Grässlin indoor/outdoor enclosure for protection. The timer module is removable for programming or replacement‚ simplifying maintenance.
Ensure secure connections and follow all local electrical codes. Incorrect wiring can damage the timer or pose a safety risk. Double-check all connections before restoring power.
Voltage Requirements
Grässlin timers are designed to operate within specific voltage ranges. It is essential to verify the voltage requirement printed directly on the timer unit before connecting to a power source. Connecting to an incorrect voltage will likely cause damage and void the warranty.
Typically‚ units are available for various voltages; confirm compatibility with your local electrical supply. Always disconnect power before any wiring adjustments to prevent electrical shock.
Enclosure Options (Indoor/Outdoor)
Grässlin offers both indoor and outdoor enclosures for Talento 800 Series timers‚ providing protection against the elements. For stand-alone installations‚ utilizing a Grässlin indoor/outdoor enclosure is highly recommended. These enclosures safeguard the timer module from moisture‚ dust‚ and temperature fluctuations.
Outdoor enclosures are constructed from durable materials‚ ensuring reliable operation in harsh environments. The timer module can be easily removed from the housing for programming or replacement purposes;
Mechanical Timer Operation
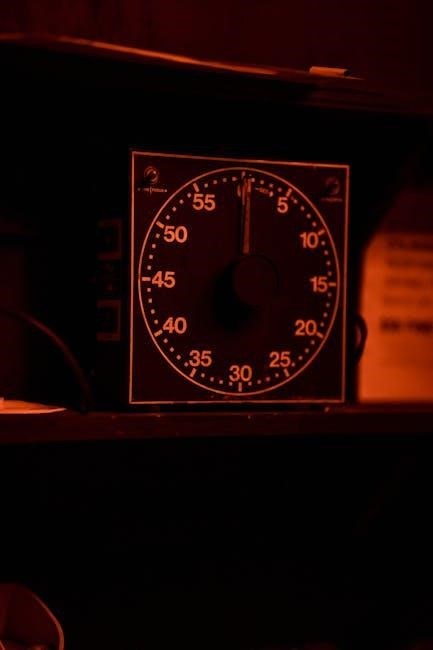
Grässlin mechanical timers are straightforward to operate. The timer is currently set to activate at 10:00 PM; align the pointer with the 22H00 marking on the time dial to confirm this setting. To adjust on/off times‚ rotate the dial‚ ensuring the pointer accurately reflects your desired schedule.
Remember that each increment represents a specific time. Precise alignment is crucial for accurate timing; These timers offer a reliable‚ analog solution for basic scheduling needs.
Setting the On/Off Times
To set the desired on and off times with a Grässlin mechanical timer‚ carefully rotate the time dial. Align the pointer with the specific time you want the device to activate (e.g.‚ 22H00 for 10:00 PM).
Ensure precise alignment with the markings for accurate scheduling. Repeat this process for the off time‚ creating a defined on/off cycle. Double-check your settings before finalizing to guarantee correct operation.
Understanding the Time Dial (24-Hour Format)
Grässlin mechanical timers utilize a 24-hour time dial‚ presenting times from 00H00 to 23H59. This format eliminates AM/PM ambiguity‚ offering precise scheduling. Each hour is clearly marked‚ with smaller increments indicating minutes.
The pointer indicates the activation time. Familiarize yourself with this system for accurate settings. Align the pointer precisely with the desired time marking for reliable operation‚ ensuring your devices switch on and off as intended.
Electronic Timer Programming
Grasslin electronic timers offer flexible scheduling through a user-friendly programming mode. Accessing this mode allows customization of on/off times‚ catering to diverse needs. These timers boast 20 memory locations‚ enabling storage of numerous programs for varied applications.
Utilize these memories to create distinct schedules for different days or events. This feature simplifies complex timing requirements‚ providing convenience and precision. Detailed instructions within the manual guide you through each programming step.
Accessing Programming Mode
To enter the programming mode on your Grasslin electronic timer‚ typically a dedicated button – often labeled “P” or “Program” – must be pressed and held for a specified duration. The display will then indicate entry into programming‚ often with a flashing indicator.
Refer to your specific model’s manual for the exact procedure‚ as button locations and hold times can vary. Once in programming mode‚ you can navigate through the settings to adjust on/off times and other parameters.
Utilizing Memory Functions (20 Memories)
Grasslin electronic timers boast 20 memory locations‚ allowing for the storage of numerous on/off schedules. This is incredibly useful for applications requiring varied timing throughout the week or year. Each memory can be individually programmed and activated.
To utilize these‚ program a schedule into a memory slot‚ then select which memory is ‘active’ – controlling the timer’s operation. This feature eliminates the need to reprogram frequently‚ offering significant convenience and flexibility.
Timer Override Switch
The Timer Override Switch provides crucial control over your Grasslin timer’s operation. It features two positions: Automatic and Manual Override. In Automatic mode‚ the timer functions according to its programmed schedule‚ controlling devices as intended.
Selecting Manual Override (position 1) bypasses the programmed schedule‚ forcing the connected device to either turn on or off‚ regardless of the set times. This is ideal for temporary adjustments or immediate control needs.
Automatic Mode Operation
Automatic mode is the standard operating state for your Grasslin timer‚ enabling scheduled control without manual intervention. To ensure proper function in this mode‚ verify the Timer Override Switch is positioned to “AUTOMATIC”.
When set correctly‚ the timer diligently follows the programmed on and off times‚ activating or deactivating connected devices precisely as defined. This mode is essential for energy conservation and automated processes‚ delivering reliable performance.
Manual Override Functionality
The Grasslin timer features a Manual Override function‚ offering temporary control beyond the programmed schedule. Activate this by switching the Timer Override Switch to the “1” position‚ effectively bypassing the automatic settings.
This allows for immediate activation or deactivation of connected devices‚ regardless of the programmed times. Remember‚ this is a temporary adjustment; the timer will revert to its scheduled program once the switch returns to the “AUTOMATIC” position.
Socket Box Timer Operation (80.10.1274.7)
The Grasslin socket box timer‚ model 80.10.1274.7‚ provides convenient time control within a compact housing. This unit‚ detailed in the Operating Manual from Grässlin UK‚ is ideal for localized applications.
Located at Vale Rise‚ Tonbridge‚ Grässlin UK offers support via phone (01732) 359888 and website www.tfc-group.co.uk. Refer to Fig. 2 in the manual for visual guidance on operation and connection details.
Index Triangle and Captive Trippers
Grasslin mechanical timers utilize an Index Triangle and Captive Trippers system‚ offering precise control in 15-minute increments across a 24-hour dial. For automatic pump control‚ ensure the Timer Override Switch is set to AUTOMATIC.
The 1 position on the switch enables manual override. Understanding this system‚ as detailed in operating manuals‚ is crucial for accurate scheduling and reliable operation of your Grasslin timer.
15-Minute Increments

Grasslin mechanical timers are meticulously designed with 15-minute increments‚ providing granular control over scheduling. The Index Triangle and Captive Trippers work in tandem to accurately mark these intervals on the 24-hour time dial.
This precision allows for highly customized on/off times‚ essential for various applications. Proper alignment of the pointer with these markings ensures the timer functions as intended‚ delivering reliable performance and efficient time management.
Troubleshooting Common Issues
Common problems with Grasslin timers often involve incorrect programming or power supply issues. Verify the Timer Override Switch is in the Automatic position for scheduled operation. If the timer doesn’t switch‚ check wiring connections and voltage requirements.
For electronic models‚ ensure proper access to Programming Mode and review saved Memories. If issues persist‚ consult the full manual or contact Grässlin UK for support.
User Guide Familiarization
Welcome! This guide unlocks your Grasslin timer’s potential. Begin with a New Timer Setup‚ ensuring correct wiring and voltage. Explore the timer’s features‚ understanding how to set on/off times and utilize memory functions.
Mastering Product Capabilities involves familiarizing yourself with the Index Triangle and Captive Trippers. Refer to the manual for detailed instructions and diagrams‚ maximizing your control system’s efficiency.
New Timer Setup
Initial setup requires careful attention to detail. First‚ verify the correct voltage requirements before connecting to the power supply. For stand-alone installations‚ utilize a Grasslin indoor/outdoor enclosure. The timer module is removable for easier programming or replacement.
Ensure the Timer Override Switch is in the AUTOMATIC position for scheduled operation; Familiarize yourself with the 24-Hour Format time dial and the 15-Minute Increments for precise timing.
Mastering Product Capabilities
Grasslin timers offer versatile programming options‚ including 20 memories for diverse scheduling needs. The Talento 800 Series provides 365-day control with one‚ two‚ or four circuits. Understand the function of Captive Trippers and the Index Triangle for accurate on/off settings.
Explore the Manual Override Functionality for temporary control adjustments. Properly utilizing these features maximizes efficiency and ensures reliable operation of your time-controlled systems.

Technical Specifications
Grasslin timers accommodate various Voltage Requirements; always verify compatibility with your power supply. Models like the Socket box timer 80.10.1274.7 are designed for specific applications. The Talento 800 Series offers both indoor and outdoor Enclosure Options for durability.
Timers feature a 24-Hour Format time dial and 15-Minute Increments for precise scheduling. Refer to the detailed operating manuals for specific model specifications and performance characteristics.

Contact Information & Support
For Grässlin UK support‚ reach out via Phone: (01732) 359888 or Fax: (01732) 354445. Their address is Vale Rise‚ GB-Tonbridge/Kent TN9 1TB.
Extensive resources and further assistance are available through the TFC Group Website: www.tfc-group.co.uk. Detailed operating manuals‚ including those for the Socket box timer 80.10.1274.7‚ can often be downloaded directly from their site. Ensure you have your model number ready for efficient support.
Grässlin UK Contact Details
Need direct assistance with your Grässlin timer? Contact Grässlin UK at their dedicated support line: Phone: (01732) 359888. For documentation requests or technical inquiries‚ utilize their fax service: Fax: (01732) 354445.
Postal correspondence should be directed to Grässlin UK‚ Vale Rise‚ GB-Tonbridge/Kent TN9 1TB. Remember to clearly state your timer model number when contacting support for faster resolution of any issues.

TFC Group Website
Access a wealth of resources at the official TFC Group website: www.tfc-group.co.uk. This online portal provides detailed product information‚ downloadable manuals – including those for Grässlin timers – and frequently asked questions to assist with setup and operation.
Explore technical specifications‚ wiring diagrams‚ and troubleshooting guides. The TFC Group website serves as a valuable self-help resource for Grässlin timer users seeking comprehensive support and documentation.
Grasslin Timer Applications
Grässlin timers offer versatile solutions for diverse control needs. Common applications include managing lighting systems – both indoor and outdoor – optimizing pump operations‚ and automating heating or ventilation equipment. They are ideal for agricultural settings‚ commercial buildings‚ and residential use.
Benefit from precise scheduling for energy conservation‚ security enhancement‚ and process automation. Grässlin timers streamline operations‚ reducing manual intervention and improving overall efficiency across a wide spectrum of applications.
Warranty Information
Grässlin timers are built to last‚ backed by a commitment to quality and reliability. Specific warranty terms vary depending on the timer series and region of purchase. Generally‚ Grässlin provides a warranty against defects in materials and workmanship for a defined period.
To validate your warranty‚ retain your proof of purchase and register your product; Contact Grässlin UK or TFC Group for detailed warranty information and claim procedures. Proper installation and adherence to operating instructions are crucial for warranty validity.